
TLDR:
I’ve added some environmental details to the plain bases of my AvP miniatures.
I’ve used putty in conjunction with a press-pad called ‘Basius‘.
In this article I show you step by step how I did it.
Intro
When I first bought AvP: The Hunt Begins, I realised the bases the models came with were just plain and I wanted more detail to match the environment in which the game plays out: The USCSS Theseus spaceship. I therefore bought some pre-made resin bases containing extra detail and they’ve been great for my Alien Infant Warriors and Alien Stalkers. However, I wanted to try and make some of my own to keep costs down and make use of the bases that come with models instead of ending up with a huge pile of the tiny things sitting there unused. I came across just the thing a few years ago…
I bought a ‘Basius Industrial’ press-pad when the Basius 2.5 Kickstarter was run in 2015, but hadn’t really used it much (other than some early test runs). It was time to put it to use!
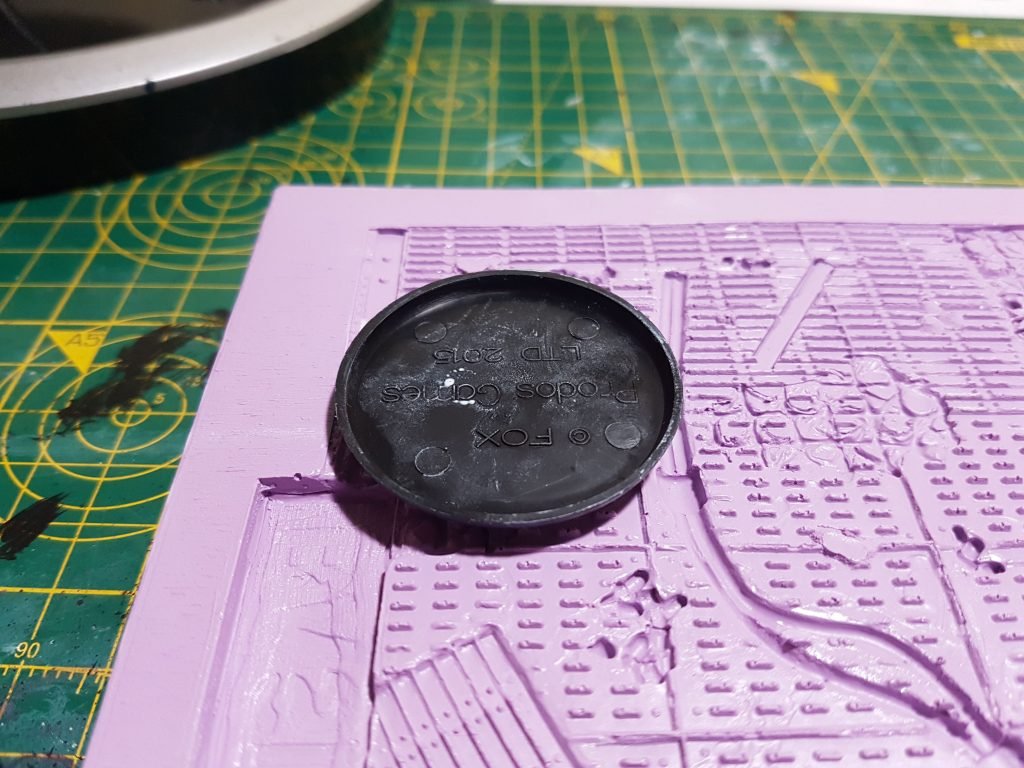
Originally calling themselves War Games Bakery, but now known as History Craft, the creators of Basius describe it as: “a collection of easy-to-use negatively detailed solid resin press-pads. They are designed by a family of gamers for use in miniature tabletop games, role playing games and board games.” Below is a pic of my ‘Industrial’ Basius in use.
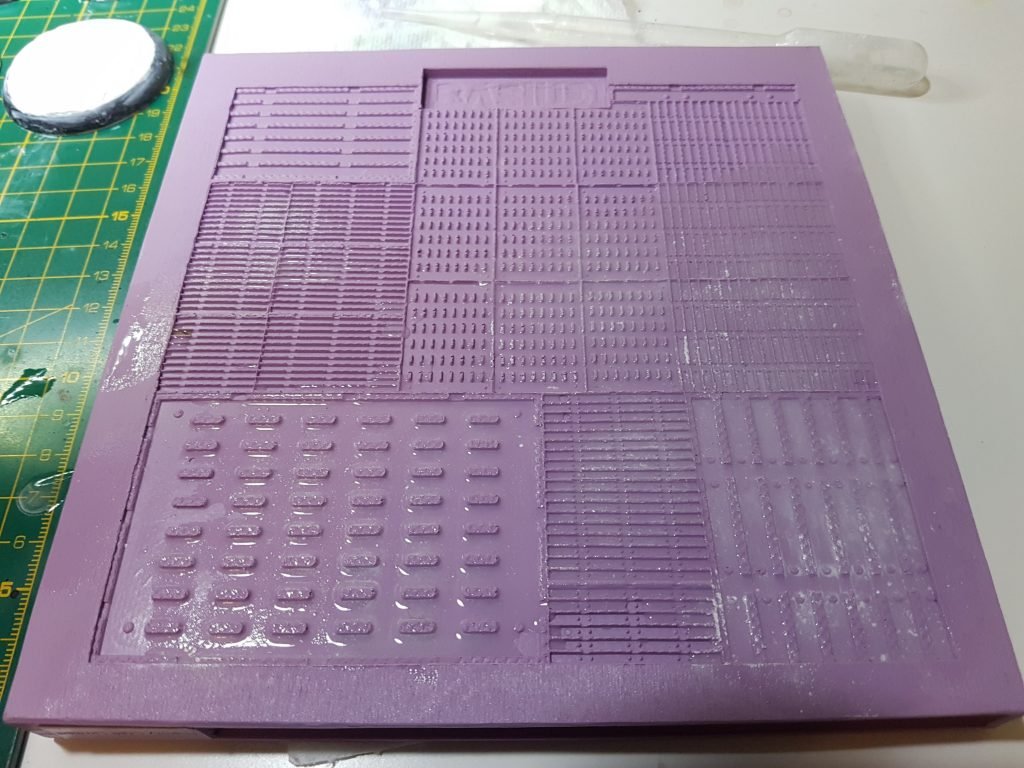
When looking at a Basius, it’s worth keeping in mind that your bases will end up with the inverse or “negative” of what you see sculpted on the pad. This is because you’re going to press putty onto the top of the pad, which will come away with an imprint of the pad’s design. So, taking the bottom left of the above photo as an example, you’ll end up with a mostly flat base with multiple rounded oblong recesses in it. You won’t get a mostly flat base with rounded oblong protrusions on it.
So far I’ve used this with my AvP: The Hunt Begins models. The industrial theme of this press-pad is ideal for replicating the futuristic, Sci-Fi flooring of the USCSS Theseus – the spaceship on which the game takes place.
At the moment, the Basius is a little tricky to come by because it’s not yet available at retail. It’s seen several Kickstarter campaigns now, and according to History Craft’s website, they will be bringing them to their online store this year (2019). If you like what you see in this article, keep an eye out on their website later this year.
How to base with Basius:
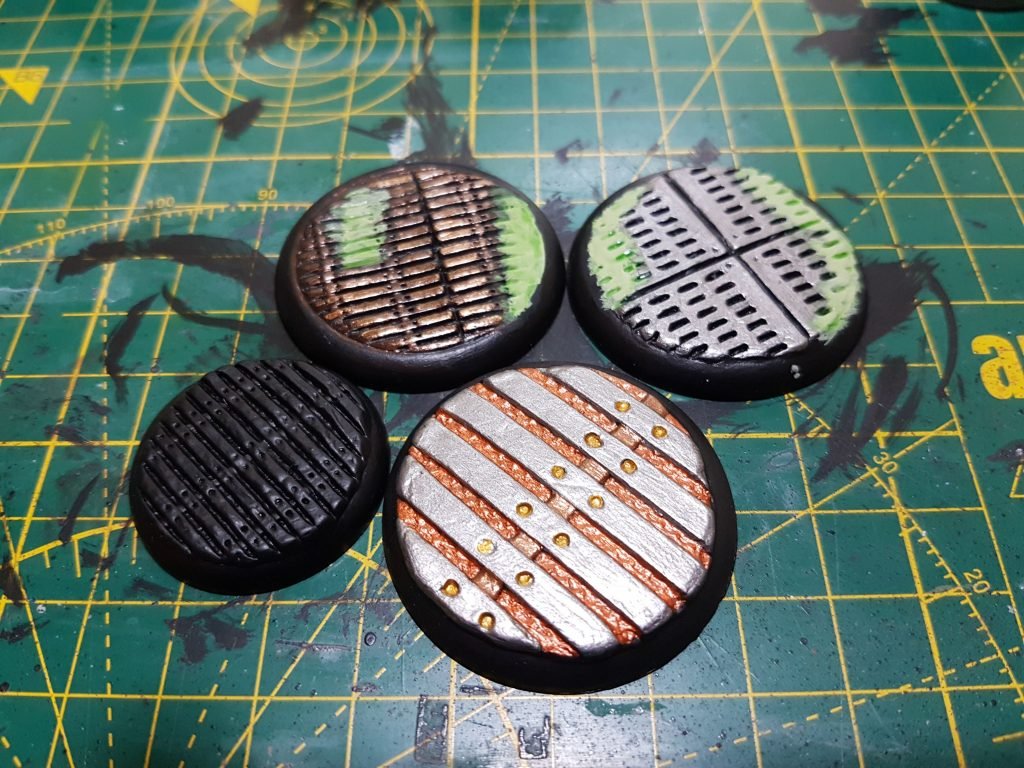
Here, I’ll run through step by step how I created the bases you saw in the header image on this page.
Step 1 – Prep
Gather together the following tools and supplies:
- Milliput or Green Stuff or another putty with similar properties, whichever is cheaper/more easily available. If you go for Milliput (like I have), get the ‘superfine’ white and mix it well, for five mins
- Nitrile gloves – available on Amazon or ebay, these side-step allergic reactions some people can have to latex. You also don’t want to be touching Milliput with your bare hands!
- Scalpel or craft knife – available at craft shops, stationery outlets and Amazon/ebay
- Self-healing cutting board – available at craft shops, stationery outlets and Amazon/ebay
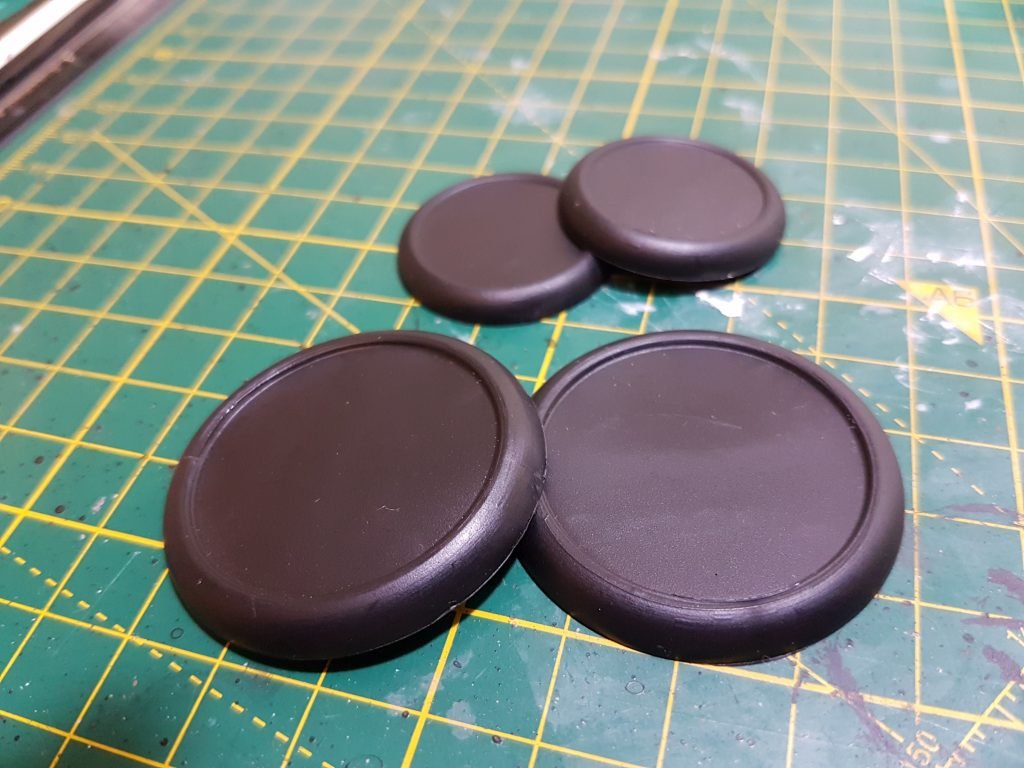
- Some plain miniature bases of any sort – I’ve used ones from AvP: The Hunt Begins. If you have miniatures, you’ll most likely have some bases!
- A Basius press-pad or similar negative press-pad (and/or your own mad skills at sculpting!)
Step 2 – Trimming the flash
Next, you’re going to want to grab some of your bases and trim off any flash using your craft knife. As with most of miniature modelling, the tidier your prep, the better the end result.
Step 3 – Put your gloves on; get your putty
Next, put your gloves on and find your putty, whether it’s Green Stuff, Milliput or another product. Here’s mine:
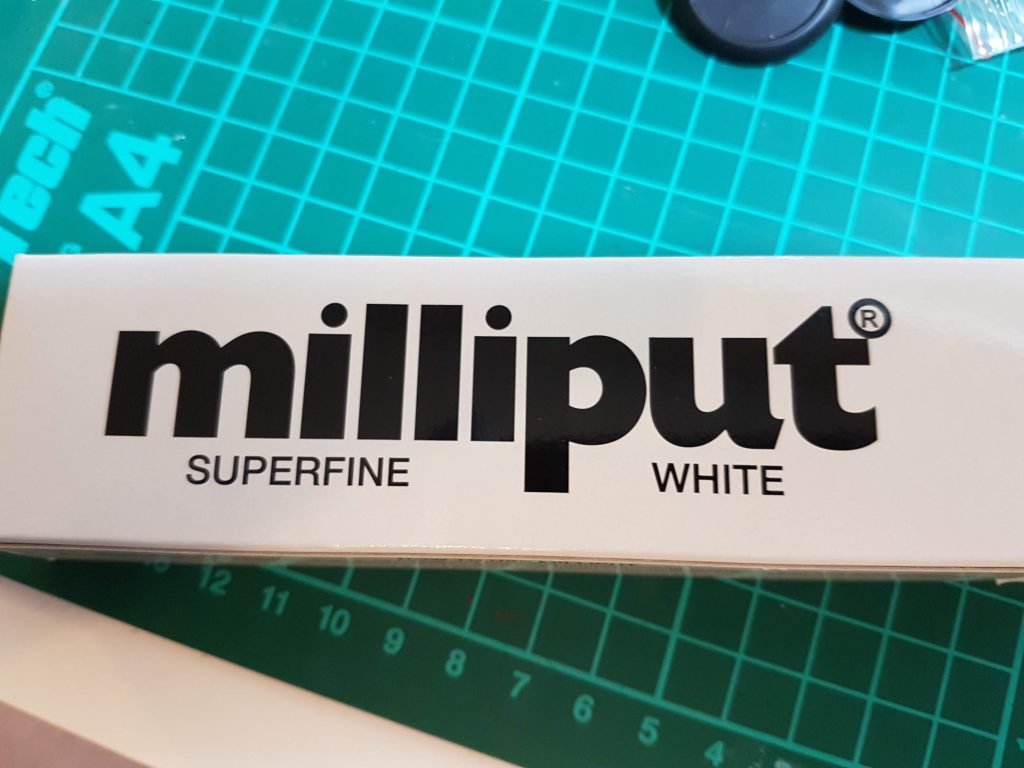
You’ll find that it comes in two different parts:
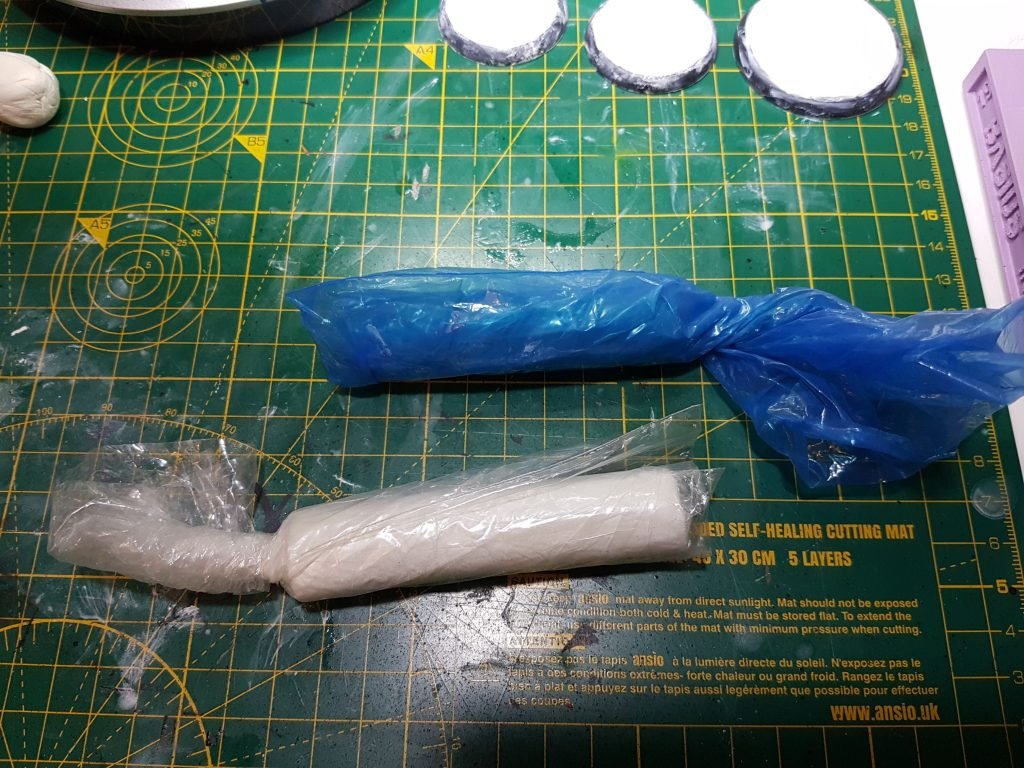
It’s not actually half blue and half white. The putty in the blue bag is grey.
Notes about putty:
Milliput is a binary compound and its components are stored separately so that the putty doesn’t activate and dry out on your shelf. As soon as you combine it, you’re on the clock and will need to use it relatively quickly if you want to make life easy for yourself. You can refresh putty with a little water, just like clay, but it will slowly become less malleable as it naturally wants to firm up and set, which is the end result we’re after – but only once we’ve attached it to the base and sculpted it!
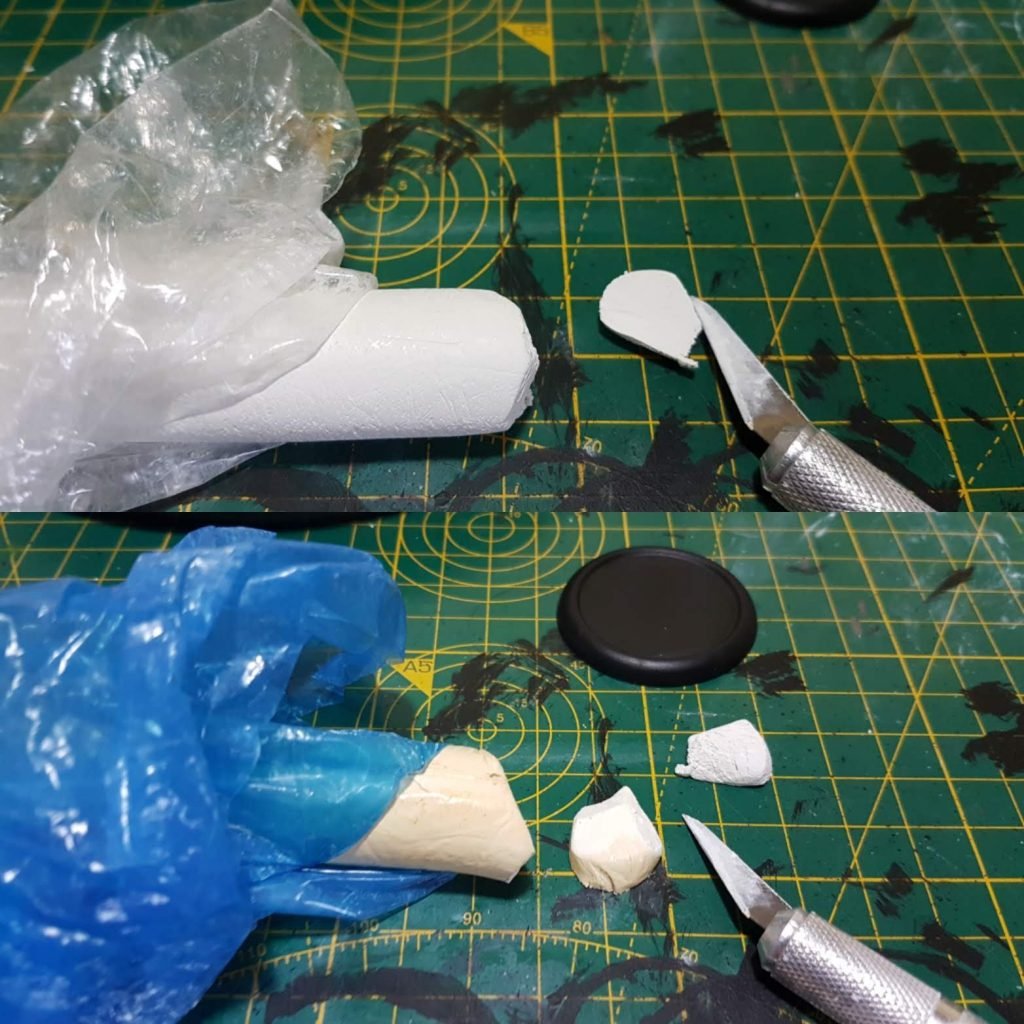
Step 4 – Cut your putty
Unwrap one stick at a time and cut off equally-sized pieces of each colour of putty using your craft knife.
Your knife can get gunked up with putty when doing this and it will dull your blade. You can either reserve one knife to ‘be your putty knife’ or wipe it clean with a wet cloth as you go. If you let it harden, it can be much more tricky to remove from the blade.
When choosing how much putty to produce, consider your base size as well as the depth of relief in the section of the Basius that you wish to imprint. I found that in most cases – in combination with 30mm and 40mm round, lipped bases – a circular ball between a third to half the diameter of the base was sufficient to get good coverage. (See photo in step 5 for an example of this.)
When you’ve cut off the pieces you need, make sure to wrap each stick back up separately and stow it away so it stays fresh.
Step 5 – Combine your putty
Next, take the two pieces you’ve cut off and combine them by kneading them together in your hands. You can roll it between your hands, compress it between your fingers and even place it on your cutting mat and roll the base of your hand over it like you’re making pastry. Anything goes to get it blended to a single colour and increase its mobility.
The Milliput instructions recommend mixing/kneading the ‘Superfine’ putty for 5 mins. Because the colours of both sticks of Milliput Superfine are very similar, look closely to make sure you can no longer see separate colours. It should end up soft and a unified white colour, which is a good sign you’ve mixed it well.
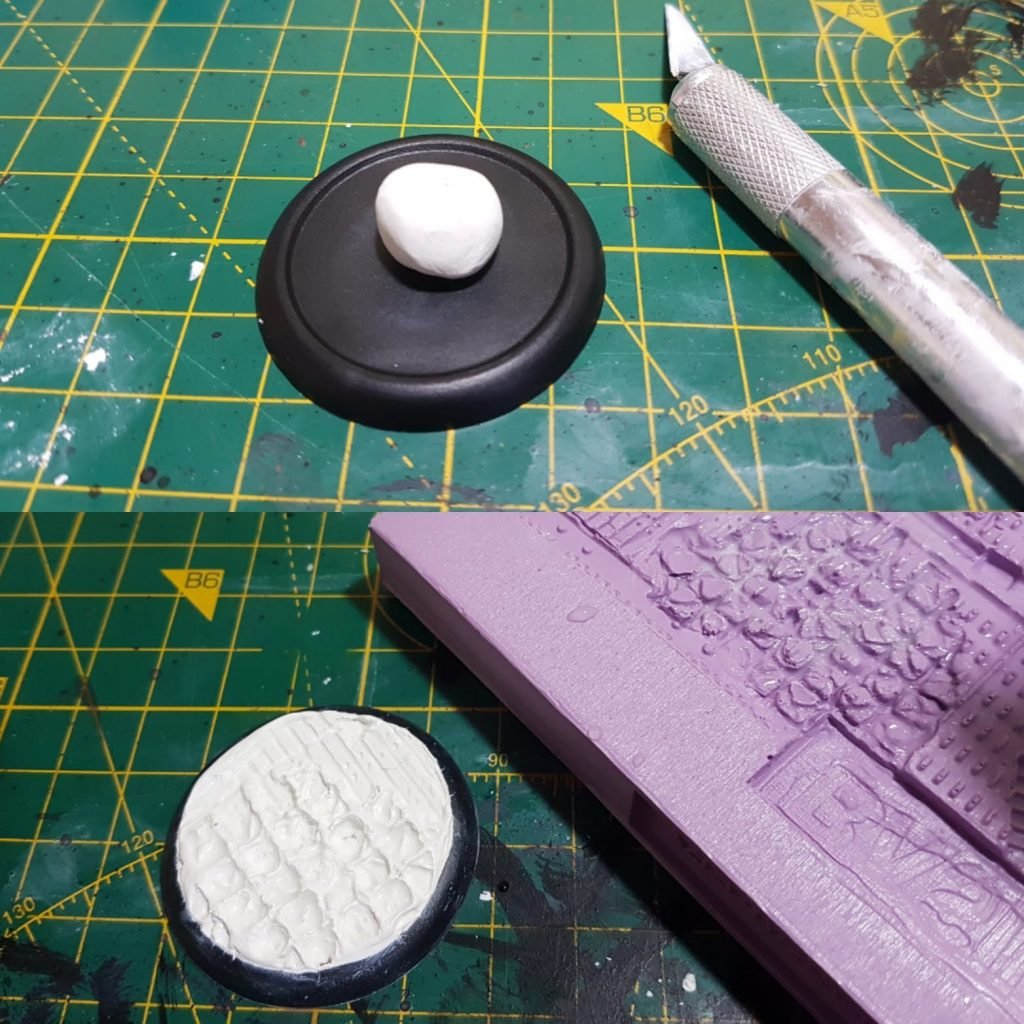
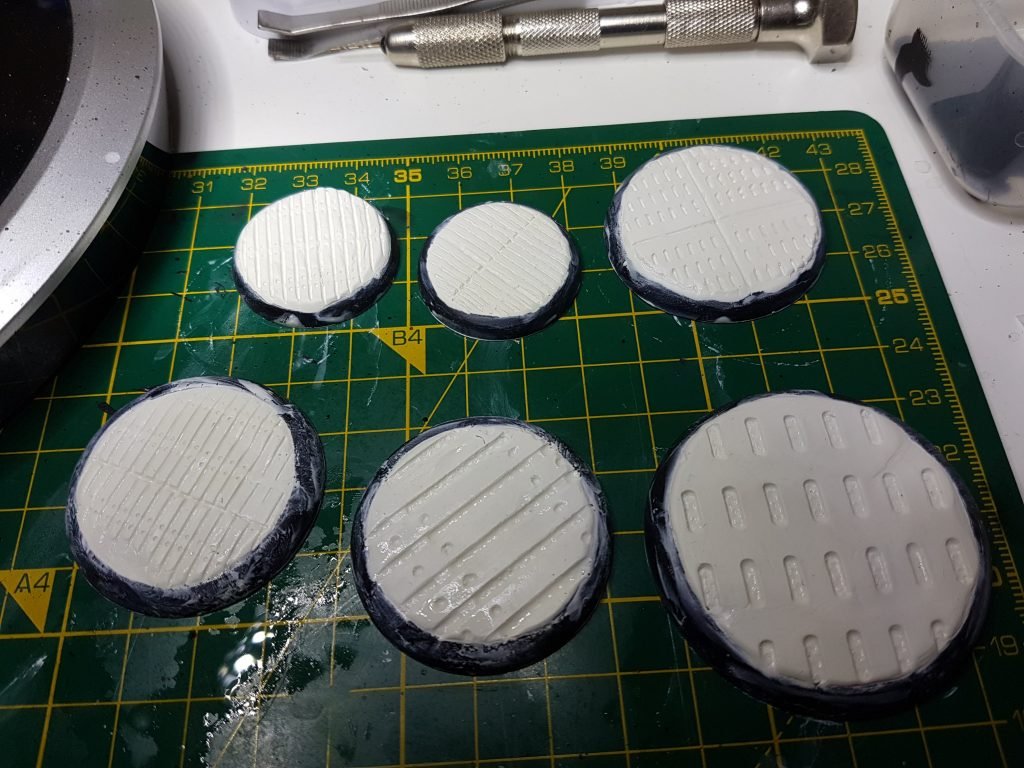
It went on to make the base shown in the bottom photo, which is still drying here.
When choosing how much putty to combine, consider your base size as well as the depth of relief in the section of the Basius that you wish to imprint. I found that in most cases – in combination with 30mm and 40mm round, lipped bases – a circular ball between a third to half the diameter of the base was enough to get good coverage.
Step 6 – Flatten your putty onto the base
Now press your putty onto the top of your base (not the Basius!) and press and mould it across the surface of the base and up to the edges. You can let if overhand if you like, but you’ll probably want to cut the overhanging piece off once you’ve imprinted it.
I found it can be tricky to maintain the integrity of the outside edge of the relief if you have to cut some putty away after imprinting, but as with clay, you get quite a bit of leeway if you use your fingers and some water to sculpt the putty into the right shape for your base before imprinting. Your exact approach will vary depending on the type of bases you’re working with.
Step 7 – Imprinting
Now comes the fun bit… If you haven’t already, decide which area of your Basius you’re going to imprint upon. Then wet that area of the Basius with a little water. This helps with removing it after imprinting.
Now, take your base that has putty applied to it, flip it upside (putty-side) down and press it onto the Basius, trying to keep pressure even and consistent so your imprint isn’t too deep one side and too shallow on the other. You also want to avoid sliding it around, as this will interfere with the detail, rending it less defined. If possible, you just want to press it down and lift if up, without any side-to-side movement.
After applying pressure, you need to carefully lift the base away from the Basius. I found that the band-aid approach is best – i.e. rip it off quick, but evenly too. If you apply to much pressure to one side when levering it off, you may distort the imprinted pattern. Be careful until you’re familiar with this process.
Step 8 – Sit back and admire your work
This is the easiest and most fun step: Simply admire your newly-sculpted base(s)!
Step 9 – Tidy up
You might want to tidy the edges if there’s any overlap and if you’ve used a very deep part of the Basius (and therefore more/deeper putty), you may wish to manually sculpt any imperfections, or just leave them as battle damage/natural wear and tear. It’s your base, so it’s up to you!
I tend to take the opportunity at this stage (when they’re still damp) to run my gloved fingers around the edges to get a really smooth finish. My thinking is that when I’ve primed my base, it will just look like one consistent item, not a base and some putty.
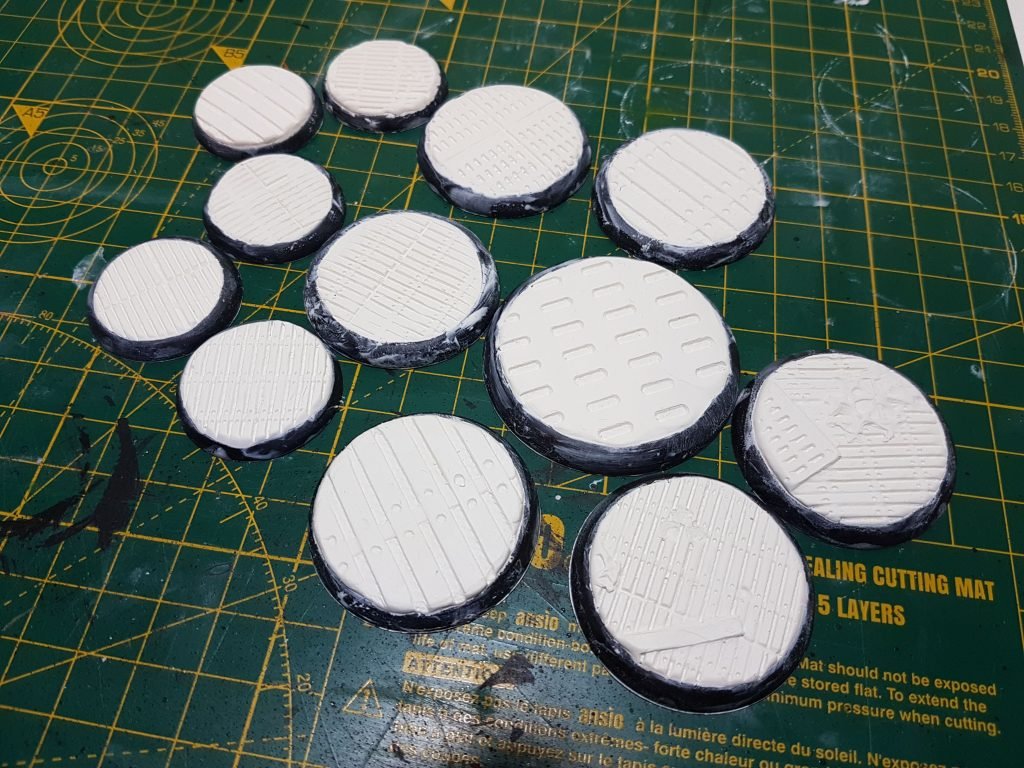
I’d advise leaving Milliput to dry overnight and when you return to it in the morning, it’ll look much better without any water on it. Here are some that have dried fully:
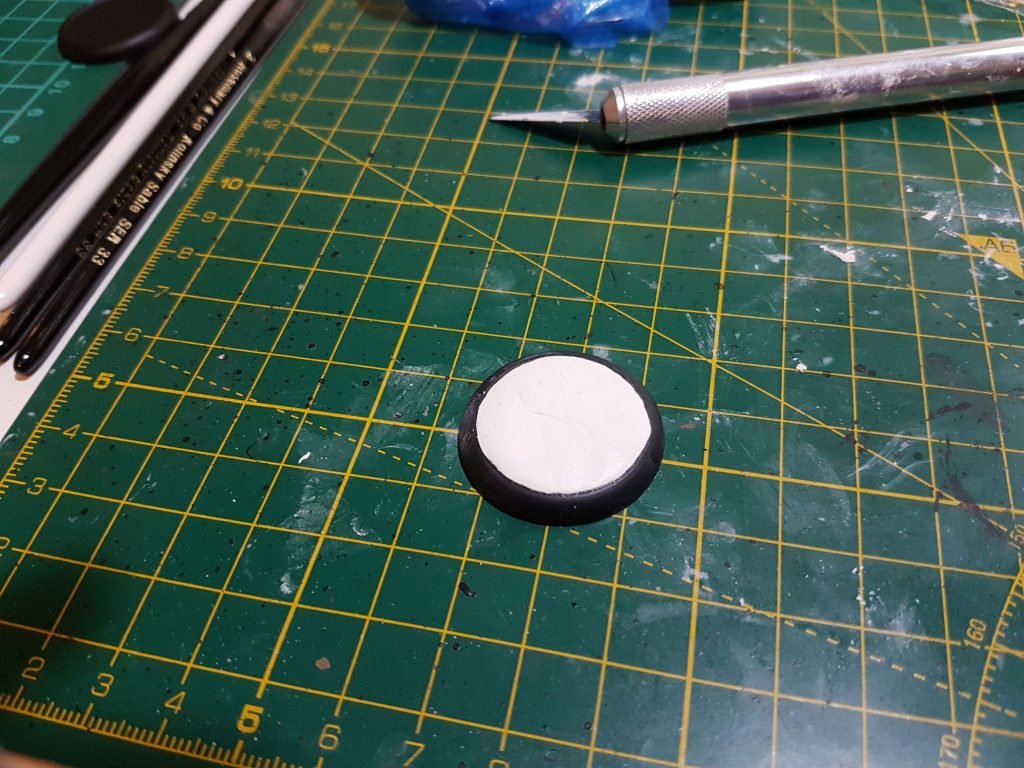
Step 10 – Paint your bases
Your normal undercoat/primer should work on the dried putty, but you may wish to experiment. I found that the milliput absorbs quite a bit of the Vallejo paint-on black primer I use, so I did two coats in some cases.
The process of priming your newly-created bases will unify the imprinted putty with its plastic base, making them look like one piece. (See the black one on the left in the below photo, which has only been primed.)
The end result
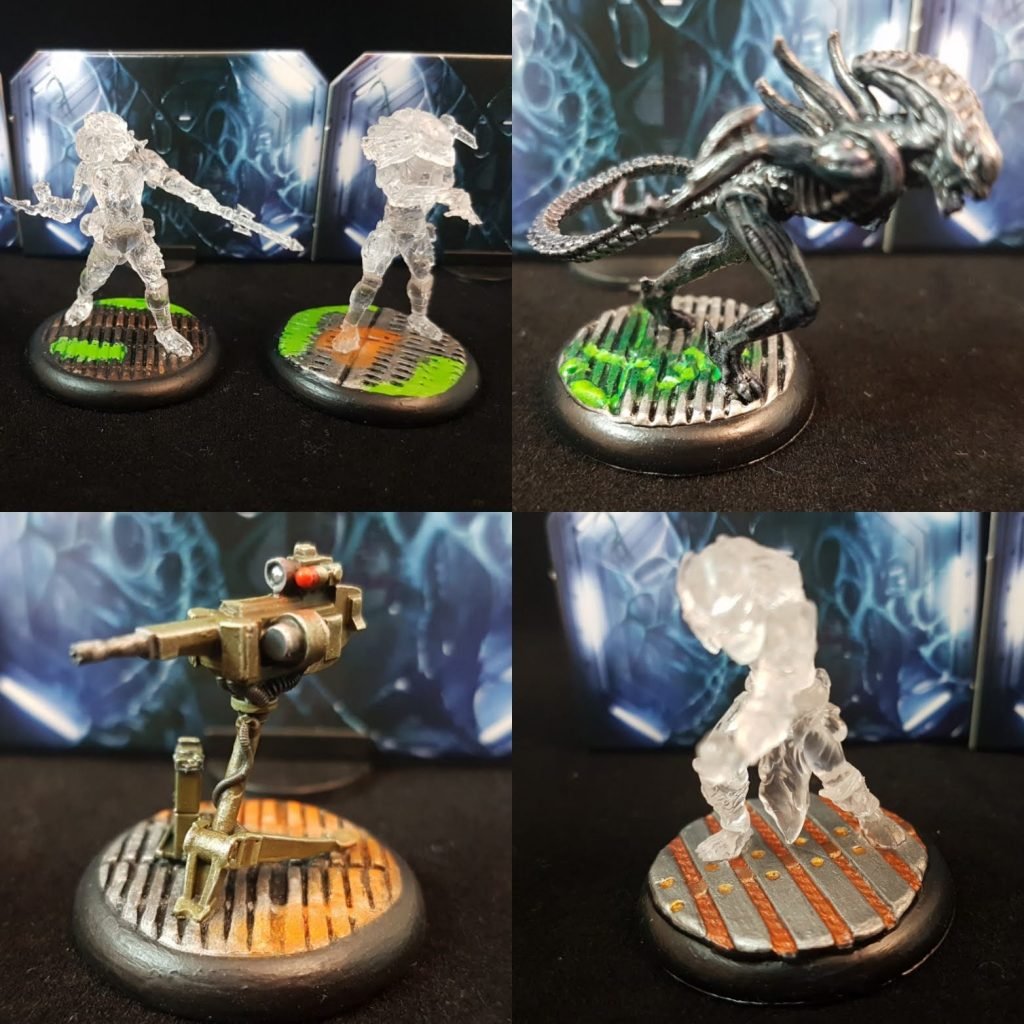
Obviously the end-game is to get some miniatures onto your lovely new bases, so here are some of my models from AvP: The Hunt Begins, including:
some “cloaked” (clear plastic) Predators, an Alien Warrior, as well as one of the auto sentry guns.
Most of these bases have acid damage and corrosion on them. The acid damage on the Alien Warrior’s base has depth from the Basius imprint, which means it’s easy to paint this to appear like the acid is pooling in the recesses.
You may wish glue your models to your bases before priming them. I’ve experimented with several approaches and found that I prefer to prime the model and the base all at once. I’ve also taken to pinning most models (especially larger ones) to the bases to ensure they stay put.
Creating my own bases has been a learning experience for me and it’s a fun and welcome addition to my hobby sessions. It’s also good to be making use of the plain bases that come with most miniatures and making them more interesting.
I hope this article gives you an idea of what’s involved and if you decide to give it a go, I hope you have fun making your own bases!
‘Til next time – game on! 🙂
Error: No feed found.
Please go to the Instagram Feed settings page to create a feed.